Table of Contents
1. Introduction
- NAT VPS (VPS IP NAT) is a type of standalone VPS with hardware configuration like a regular VPS but shares a Public IP with other VPS through NAT (Network Address Translation) technology to save IP costs for users who don't need dedicated IP usage such as game hosting, programming, automation, etc.
- To purchase NAT VPS, please visit: https://thuevpsgiare.com.vn/vps/packages?category=vps-cheap-ip-nat (Note: If you want to run Windows 10, you must use a service with storage >= 20GB, otherwise you can only install Windows Server 2012)
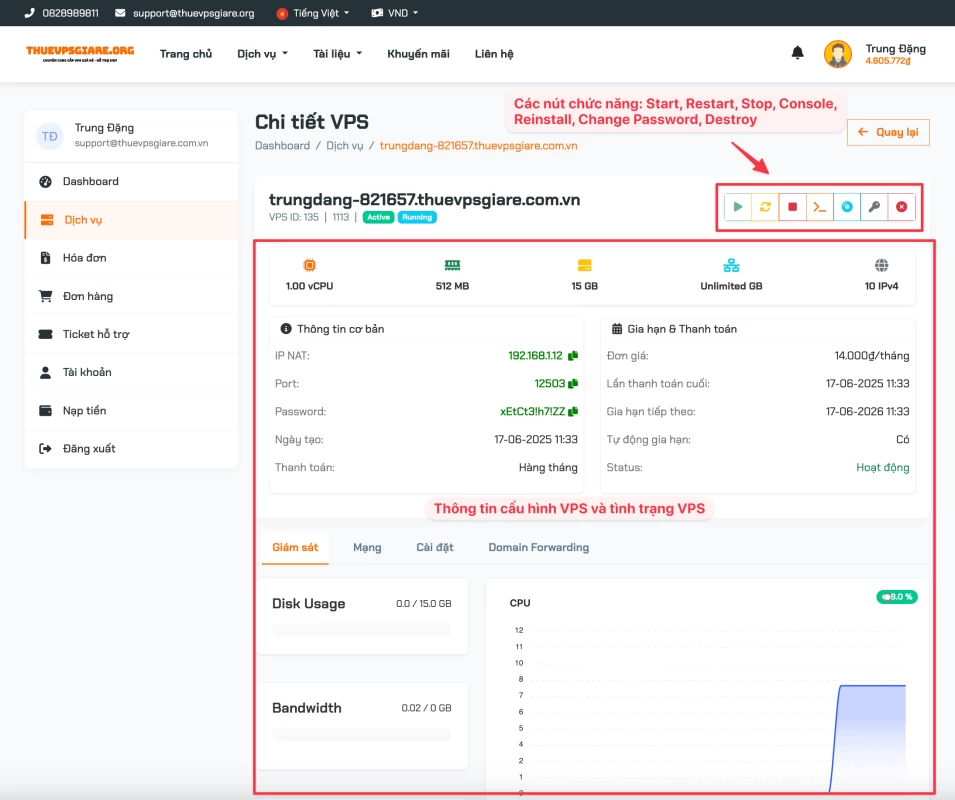
2. VPS Service Management Interface
- After purchasing the service, it will be automatically created within 1-3 minutes and the VPS management interface will look like the image below:
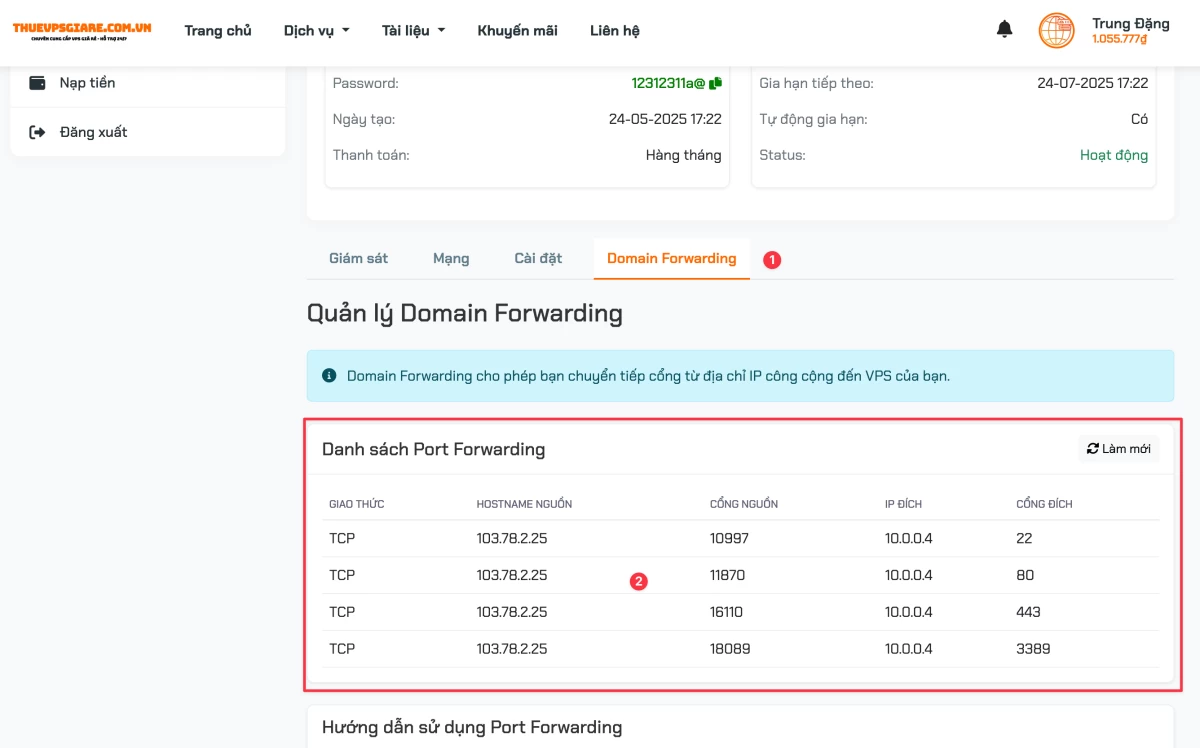
3. Getting Port Forwarding Information
- From the management interface above, select the Domain Forwarding tab to access the NAT/Port Forwarding management section. Please click Refresh if the VPS was just created and the port information may not be displayed yet.
4. Manual Port Forwarding Setup
- This feature is currently being updated.
5. Remote Desktop Guide to NAT VPS (VPS IP NAT)
- If you install Windows on your VPS, to connect to the VPS please select the Source Port corresponding to the Destination Port of the remote desktop service which is 3389. In this example, it's port 18089
- When connecting via remote desktop, you will enter the IP address and port in the connection field: 103.78.2.25:18089
5. SSH Guide to NAT VPS (VPS IP NAT)
- If you install Linux on your VPS, to connect to the NAT VPS via SSH please select the Source Port corresponding to the Destination Port of the SSH service which is 22. In this example, it's port 10997
- When connecting via SSH, you will enter the IP address and port in the SSH connection field: 103.78.2.25 and use port 10997
For any issues you encounter, please contact us for the fastest support.
Wish you success!